
Your home can become a cost-effective sustainable home by sealing your home envelope, informed through an energy audit. Sealing the home envelope is helpful for cold and hot weather climates. While an energy audit is most thorough, we start by fixing visible and known issues, as described below and in related links.
My Experience
My husband swore his Chicago house would be energy efficient, but when the auditor’s fan turned on, he had a wind tunnel from the attic that slammed doors open! We have audited 2 homes and a not-for-profit, and each time there were major surprises. By doing what they recommended, we made many rooms more comfortable and saved a lot of money year around – helping us in our retirement!
Your Choices
| Sustainable Homes: Seal Home Envelope Action Choices and Links | Price | Notes |
| Perform an Energy Audit | $$$ | Most cost-effective for older homes |
| Seal the Home’s Thermal Envelope | $$ | Good savings for older homes |
| Seal Accessible HVAC Ducts | $$ | Save 15-20% of high-pressure air passing through ducts, even in many new homes |
| Insulate Hot Water Pipes and HVAC Ducts | $$ | Particularly useful if ducts/pipes pass through untreated (uninsulated) areas |
| Seal Any Unfinished Basement | $$ | For unfinished basements only |
| Check Recessed Lights for Air Leaks | 0 to $$$ | Can be as simple as replacing with LED recessed lights |
| Other Ideas for a Sustainable Home | 0 to $$$ | Links to caulking, improving windows, lowering thermostat, improving insulation and more! |
Background: Perform an Energy Audit
An energy audit can determine the best place to seal your home, so that there is no warm air leaking out during winters, or in during summers. This is also called sealing the building’s thermal boundary or thermal envelope (Harley, 2012) (Holladay, 2017). Locations within that boundary are called ‘conditioned’ and any parts of the house outside the boundary are ‘unconditioned’. In addition to reducing fuel and electric bills, sealing your home envelope can also reduce cold or hot spots, drafts, noise, moisture on windows, and discover health issues related to mold and excessive dust.
What An Energy Audit Does
An energy audit process uses a blower door to blow air out of the home. The blower door enables you to feel wind leaking in. In addition, a thermal camera can show hot and cold spots in your home, which may indicate where additional insulation is required. The audit leaves you with a report, indicating useful fixes. Auditors are expert advisors for evaluating home energy changes, such as recommending ways to ensure condensation does not form on colder surfaces in a home (exterior walls or protrusions), which may enable mold to develop. One good place to find an expert for home performance assessment is through Energy Star.
An energy audit will provide statistics about your home. ACH50: the Air Changes per hour indicates how often your indoor air is completely exchanged with outdoor air per hour. The Canadian R-2000 standard sets 1.5 ACH50 as desirable for energy-efficient home building standards. A second statistic is the CFM50, which is the air flow at a pressure difference of 50 pascals between indoor and outdoor pressures. Preferred CFM50 rates range between 1000-2000; below 1000 a mechanical ventilation system is recommended (Holladay, 2017).
How Your House Loses Energy
Heat rising in a house is due to the ‘stack effect’ (Amann et al. 2012). Generally cooler air leaks into a house at lower levels of the house and rises as it heats to higher levels of the home, also concentrating to higher pressures. This high pressure warmer air then tries to escape to the cooler, low pressure air outside air, at the top of the house. So leaks at the bottom of the house let cold air in and leaks at the top of the house let warm air out.
In addition to the temperature gains or losses, humidity is a concern for homes. Moisture can cause mold and mildew can aggravate allergies and asthma. Moisture can in addition rust metals, age wood products and increase off-gassing of toxins in furniture and carpeting (Amann et al., 2012). When sealing a home envelope, it is important to monitor and control humidity levels in the home, by using exhaust fans in bathroom and kitchens to whisk away excess steam from showers and cooking, as well as by controlling basement leaks and rain penetration. It is easier to eliminate or reduce humidity and toxic gases at their source, rather than after they have been dispersed throughout the home.
Seal the Home’s Thermal Envelope
Older homes were built to allow fresh air into the attic to discourage mold; it also made heating these homes an expensive effort. Insulation is like a warm sweater, but does not serve as a wind break. Therefore, cold air blows directly through simple insulation. Two solutions include:
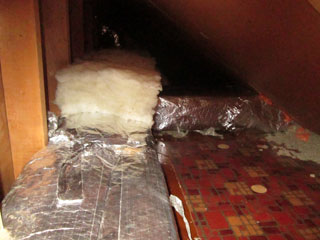
- Sealing below an attic or within the attic: This allows air to penetrate the attic but not the rest of the home.
- Sealing the attic roof. We sealed the house by filling plastic bags with loose insulation and stuffing the bags into the uninsulated rafters. Then we covered the lower, missing ceiling with pink insulation board, as shown below. Now, to cool the house, we open windows and ensure that any moisture in the air is whisked away using bathroom or kitchen fans.
Seal Accessible HVAC Ducts
For Heating, Ventilation and Air Conditioning ducts or HVAC air ducts, be sure to seal accessible ducts first. Duct seams are estimated to lose up to 20% of air flow (Amann et al., 2012) or greater, and may allow dust and other allergens to enter your home. Seams should be sealed from the outside using mastic compound (preferably) or UL-181b duct tape (shown below). Other duct tapes will dry out and not last. Mastic can be applied with a paint brush, putty knife, or cotton gloves to the thickness of a nickel (Holladay, 2017). Aeroseal is a product professionals can use to clean and seal ducts from inside the duct system (Amann et al., 2012).
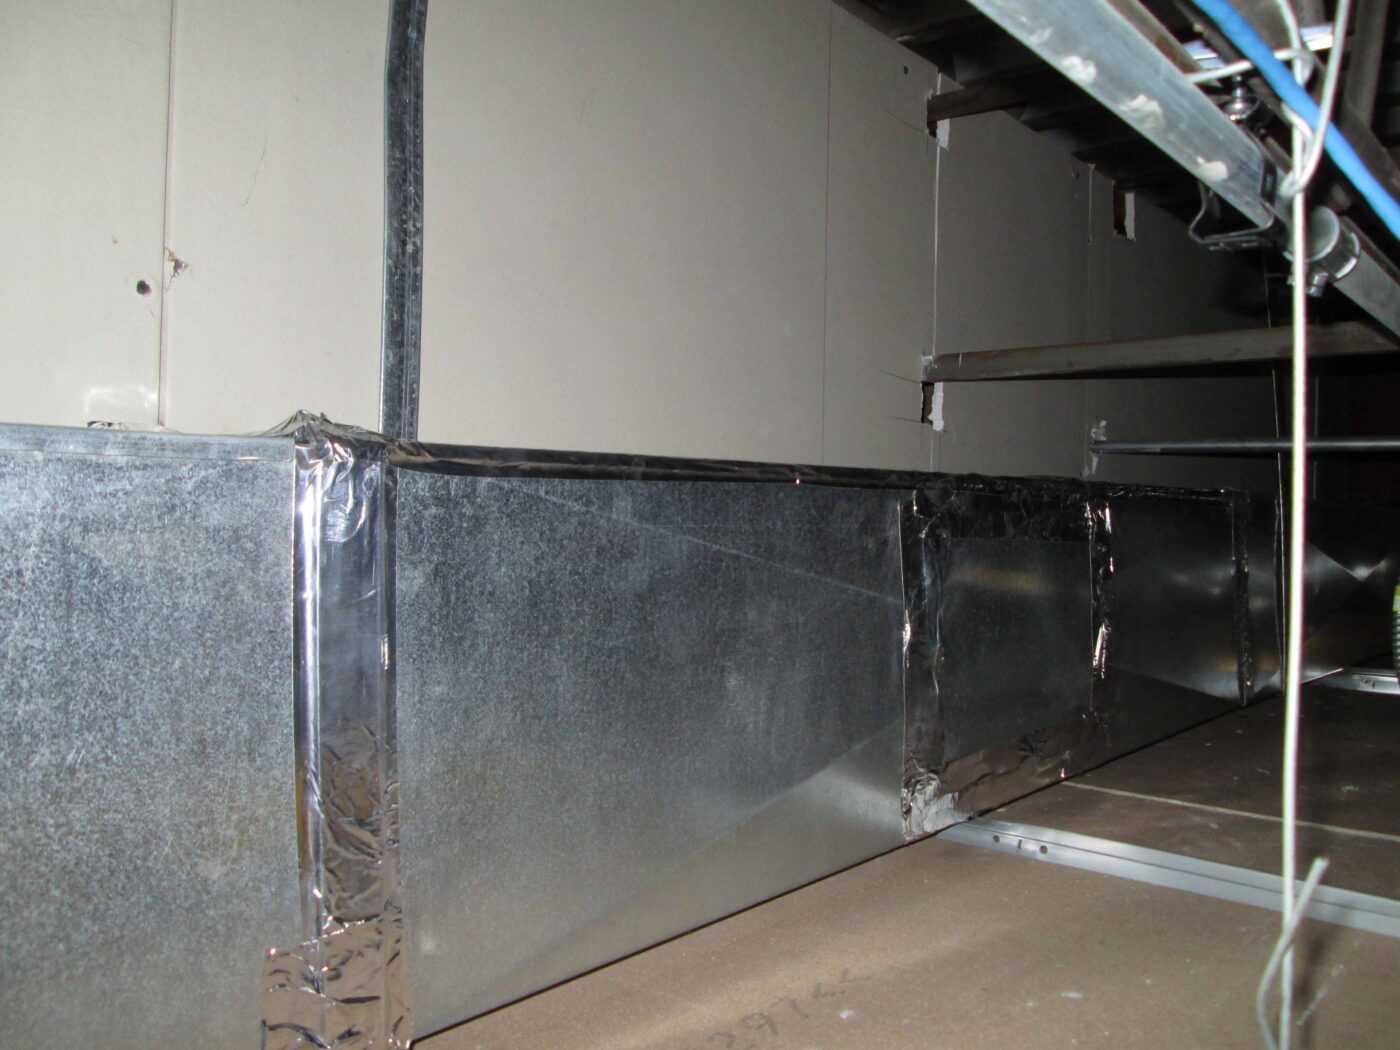
The connection between ducts and vent registers can be leaky or even broken, so seal the ducts’ vent outlets to prevent leakages to behind your walls or ceilings. In an office setting, we once saw where flexible ducts were only partially connected to their vent outlets, but instead blowing air above the ceiling leaving the office cold in winters. This explains why Holladay (2017) recommends screwing duct seams together before applying sealing mastic or tape.
Treat both the supply and return duct systems, since sealing only one flow direction can pressurize or depressurize your home. Supply provides air to your home or office interior, and the return system returns air to the HVAC system (Holladay, 2017).
Insulate Hot Water Pipes and HVAC Ducts
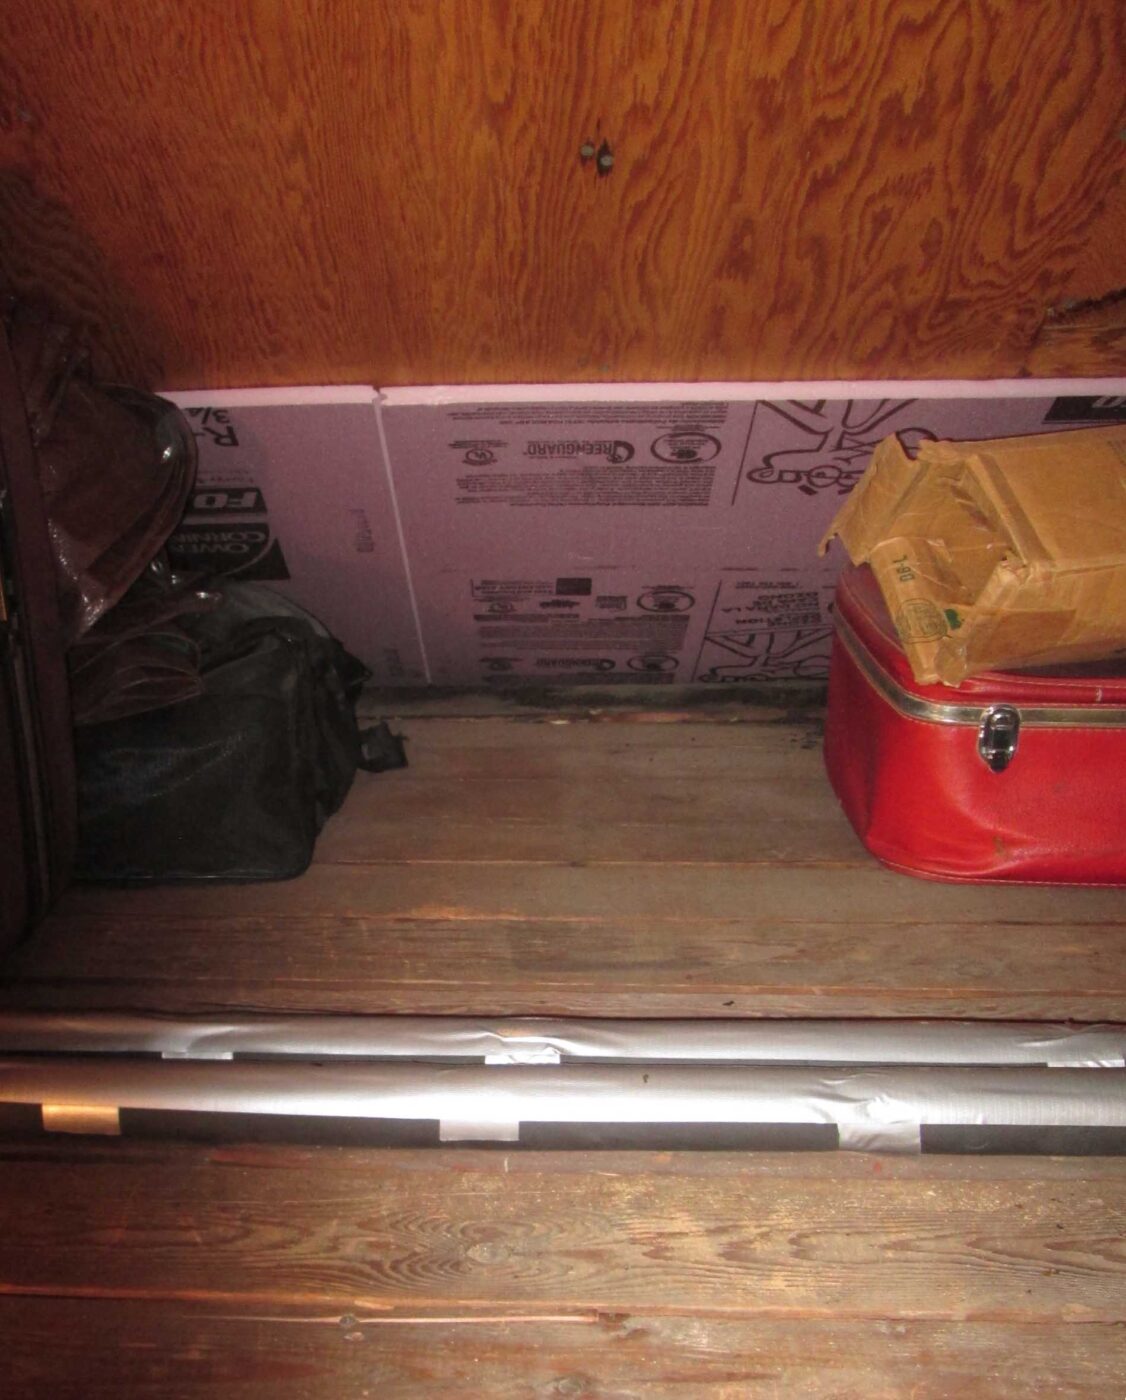
In spite of Holladay’s (2017) recommendation that ducts should be within the home’s thermal envelope, often radiator pipes or HVAC (i.e., heating, ventilation and air conditioning) ducts go through uninsulated or crawl-space storage attics. This is a waste of heating/cooling and is dangerous when radiator pipes are exposed to freezing temperatures! Experts (Harley, 2012)(Amann et al., 2012) recommend using insulation to cover pipes (shown above) or ducts (shown below). After sealing ducts, insulate any ducts in unconditioned space. Experts (Harley, 2012) (Amann, 2012) recommend insulating with a foil- or vinyl-faced fiberglass wrap at R-6 or better. In attics, increase the R-value to R-8 or R-10.
Radiator pipes can be covered in foam (1/2 inch thick) or fiberglass (3/4 inch) pipe insulation. For the radiator pipes shown above (in section Seal the Home’s Thermal Envelope), the pipe insulation did not hold well over time, particularly as we periodically accessed our storage. We taped over the pipe insulation slit with aluminum tape. Know that if your pipes already have insulation coverage, it may be asbestos – do not touch (Harley, 2012).
Benefits: Colder or drafty rooms become more comfortable and reduce energy costs. Other benefits:
- Lower heating costs!
- Radiator gets HOT water
- Reduced risk of radiator pipes freezing
- Sealing of house envelope
- No cold air flowing through attic in winter
- More comfortable attic in winter
Seal Any Unfinished Basement
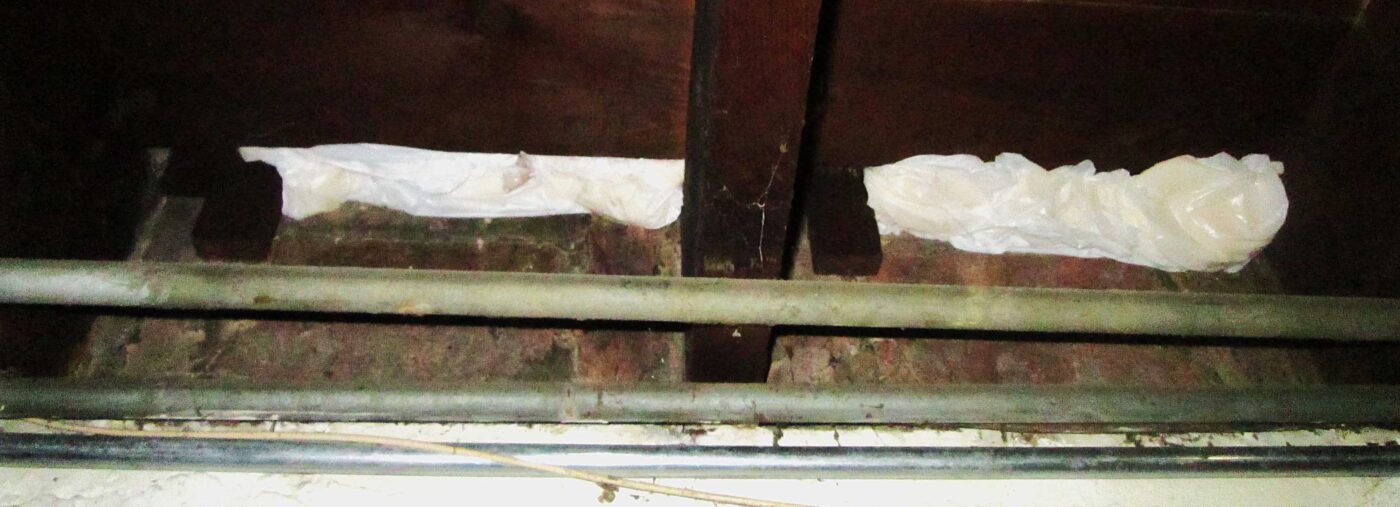
In an older home, sometimes there is a space between the brick or outer wall, and the inner walls. This can be observed in an unfinished basement, looking up, where the basement ceiling meets the edge of the wall. We would not have found this or our attic issues without an energy inspection. To fix, we again filled plastic bags with insulation and stuck them up the holes to both seal (plastic) and insulate (using insulation).
Benefits: a warmer basement in winter; a cooler basement in summer!
Check Recessed Lights for Leaks
Recessed lights can also cause a significant leak. In our case, wind came through outdoor vents directly through the recessed light containers. These containers may have holes to help cool hot incandescent lights. One option is to tape over these holes using aluminum foil tape, and use LED lights. LED lights have the advantage of being cooler, and less of a fire hazard, compared to incandescent lights.
A second option is to purchase recessed LED installations that cover the entire ceiling gap, ensuring minimal air leakage into a room. Measure the width and depth of the existing container to ensure that the new LED container will fit.
A third option is to seal the home well. Using the advice of an energy auditor, we sealed the outdoor vents, insulated that part of the attic roof and the upstairs temperature became much more stable. Of course, using well-working bathroom fans for at least 20 minutes after baths and showers is very important to reduce moisture and avoid mold. Fan timers in the bathroom can help ensure that fans run for the right duration.
References
- Amann, Jennifer Thorne, Wilson, Alex, and Ackerly, Katie (2012) Consumer Guide to Home Energy Savings, 10th edition. New Society Publishers, Gabriola Island, BC Canada.
- Harley, Bruce (2012) Insulate and Weatherize for Energy Efficiency at Home. The Taunton Press, Newtown CT.
- Holladay, Martin (2017) Musings of an Energy Nerd: Toward an Energy Efficient Home, TheTaunton Press, Newton CT.